
We'll look at further concrete variations from the position introduced last time.
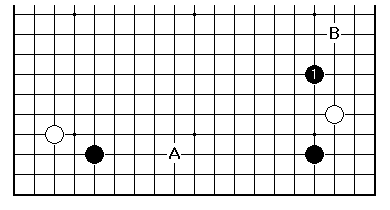
Here there are very many ways to play. Black will emphasise the right-hand corner. An exchange such as Black A, White B is very peaceful, but it seems that Black isn't trying to make anything out of first move advantage in playing that way. A pincer such as Black 1 is natural. The real difficulty of codifying opening theory in Go is illustrated by the variations here: I have come across three dozen, looking at Black and White playing once only, many of them in Chinese games. All of the regular pincers, plus the Shusaku diagonal, have been tried by Black. We'll follow just one line, worked out in the 1980s.
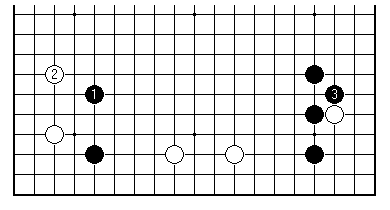
Since White's intention is usually to give up the right-hand corner with 2 and 4, Black's choice of pincer makes sense. White 4 is an ideal pincer, but Black 3 is very severe: it is unusual for White to ignore the pincer played as 1, because Black 3 is so good.
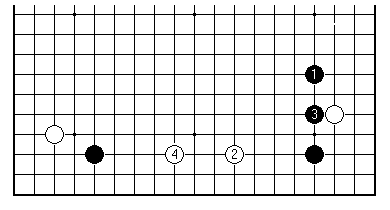
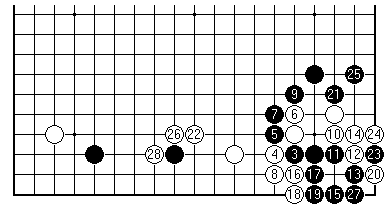
Now Black 5 to secure a large corner shows professional attitude. It is also known for Black to play in the left-hand corner at this point, to mitigate the coming attack. With 6 and 8 White makes Black a target. If Black 9 is at A, White can play B for good shape (Hirano 1p-Tei Meiki 2p Kisei 1984).
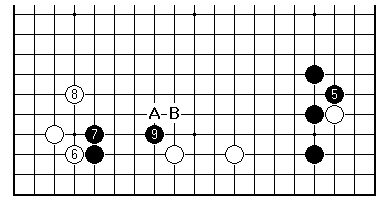
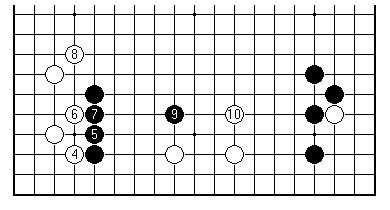
The game Shirashi 9p against Sakata 9p from the 1981 Honinbo League continued this way. White 5 guards against Black cutting across the knight's move below. The corners are now settled, while Black's group on the side lacks a base.
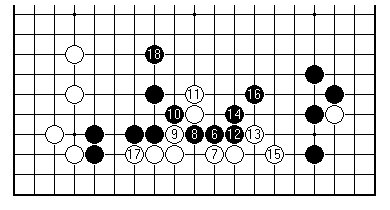
Now Black took advantage of the gap in White's shape, leading to the cut with 8 and 10. After 18 White ran out with the two stones in the centre, in Sakata style.
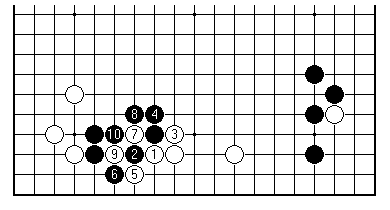
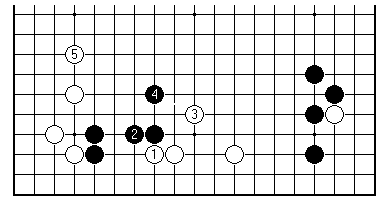
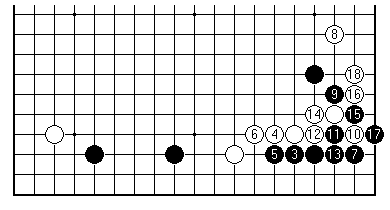
In an earlier game also involving Sakata (Black Rin 9p, 1981 JAA Cup) Black had blocked at 2.
The result is certainly not bad for White.
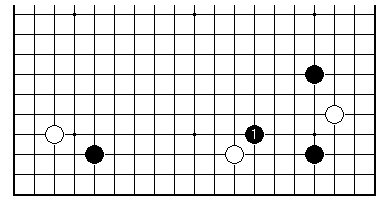
In a number of games Black has therefore reacted with 1, rather than submit to the exchange of advantages. This allows White a free hand to play 2. Now the question will be, is the black pincer stone well placed? If White builds influence that stone may look too close to it, if on the other hand a fight breaks out it might come in handy.
In this Chinese game from 1989 both White 4 and Black 5 are potentially overplays, and the fight in the corner became complicated with an implicit ko fight.
The following year in the Tianyuan tournament Cao Dayuan played the more orthodox White 4 to build influence. Black used tactics to make the corner very strong, but was left with weak stones on the outside.
A final idea for Black came from top Korean Seo Pong-su. Black plays 1 to stir up an early fight. He tried this in games in 1990/1.
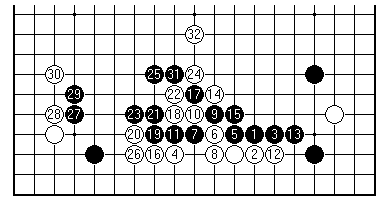
This is from the second outing, an international match against Cao Dayuan of China. (TV Asia Cup 1991). Black does succeed in the aim of making the lower side a fighting area. White however isn't obviously in trouble here (and went on to win).
While it is more than rash to draw conclusions in these matters, it does seem that Black ought seriously to consider helping the left-hand corner in this variation.
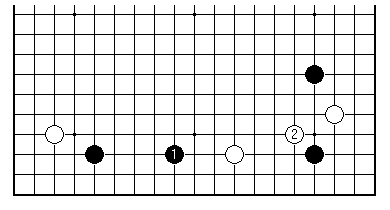
The objection to Black jumping out at 1 first before playing 3 is presumably that White takes territory, for which Black has no attacking compensation (because the white group on the side is very stable).
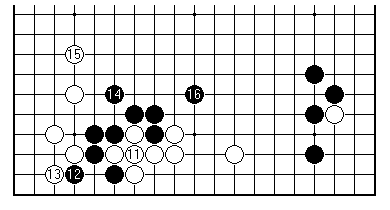
This is how it went in Cho Chikun - Sakata in the 1980 Kisei. Black 9 becomes possible, and then Black played elsewhere. This is in any case a plan with greater dynamic possibilities.
[01]
[02]
[03]
[04]
[05]
[06]
[07]
[08]
[09]
[10]
[11]
[12]
[13]
[14]
[15]
[16]
[17]
[18]
[19]
[20]
[21]
[22]
[23]
[24]
[25]
[26]
First published 11 January 2001 as On Your Side on MindZine,
Go Learning
© Charles Matthews 2000.